After having treated the topics of saxophone and technique in the last „professional hint“ section (part 2), we now look at the high or even the highest index: the flageolet tones or „high notes“. Just like the „growl“, the „high notes“ represent an essential element of the cotemporary saxophone sound. And since the invention of Rhythm'n'Blues, there's almost no saxophone solo that gets along without „high notes“ or „high-light“. In this professional hint, I want to show how the „highest consecration“ of saxophone playing can be achieved.
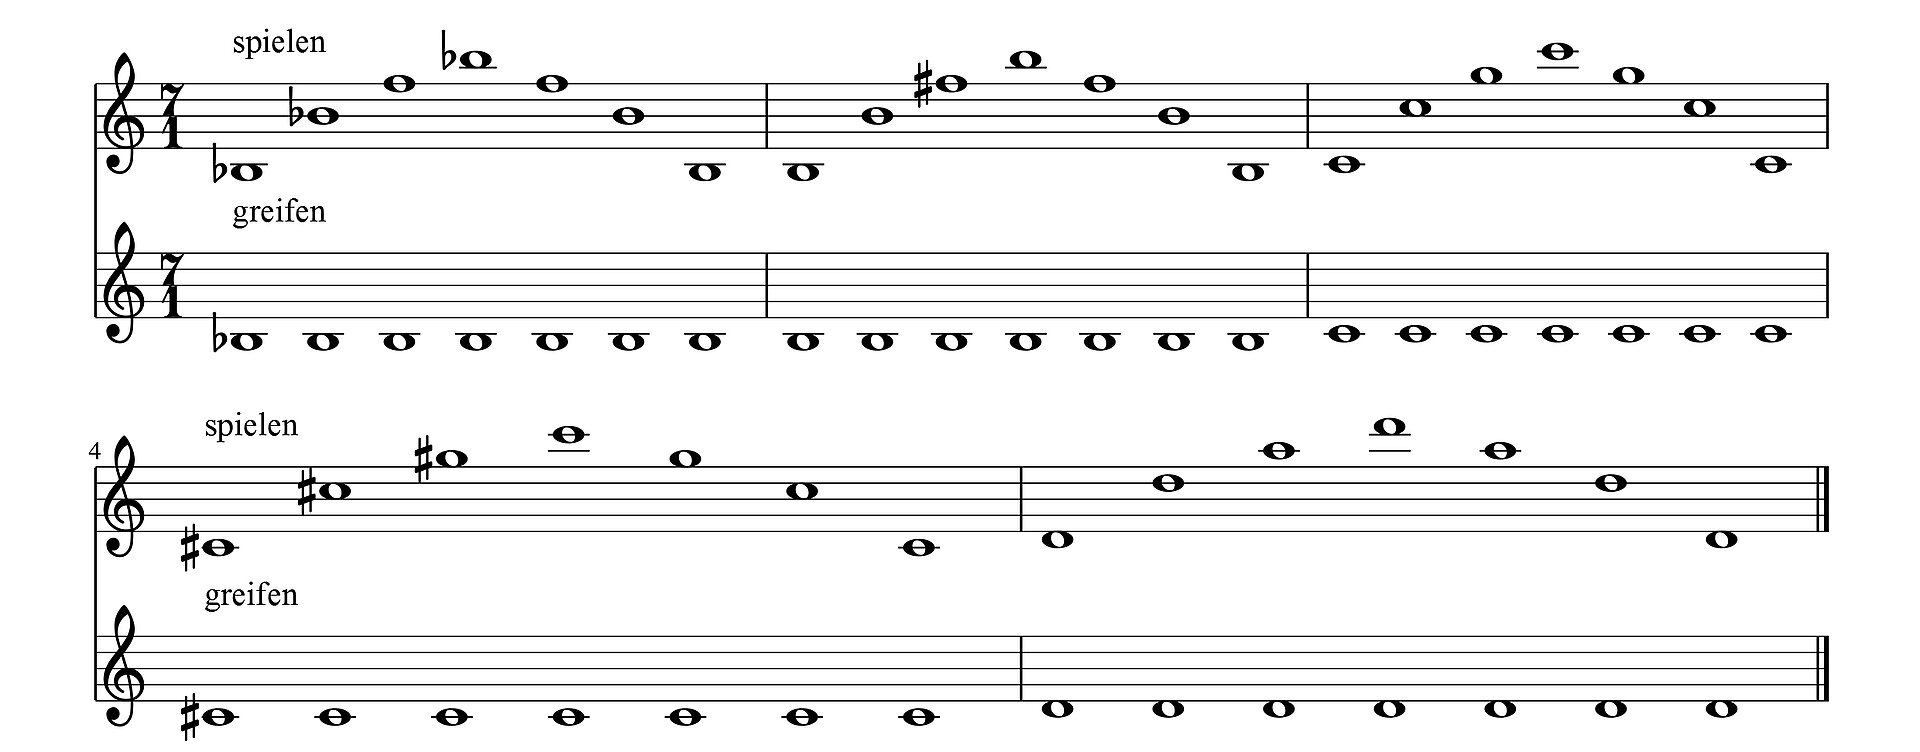
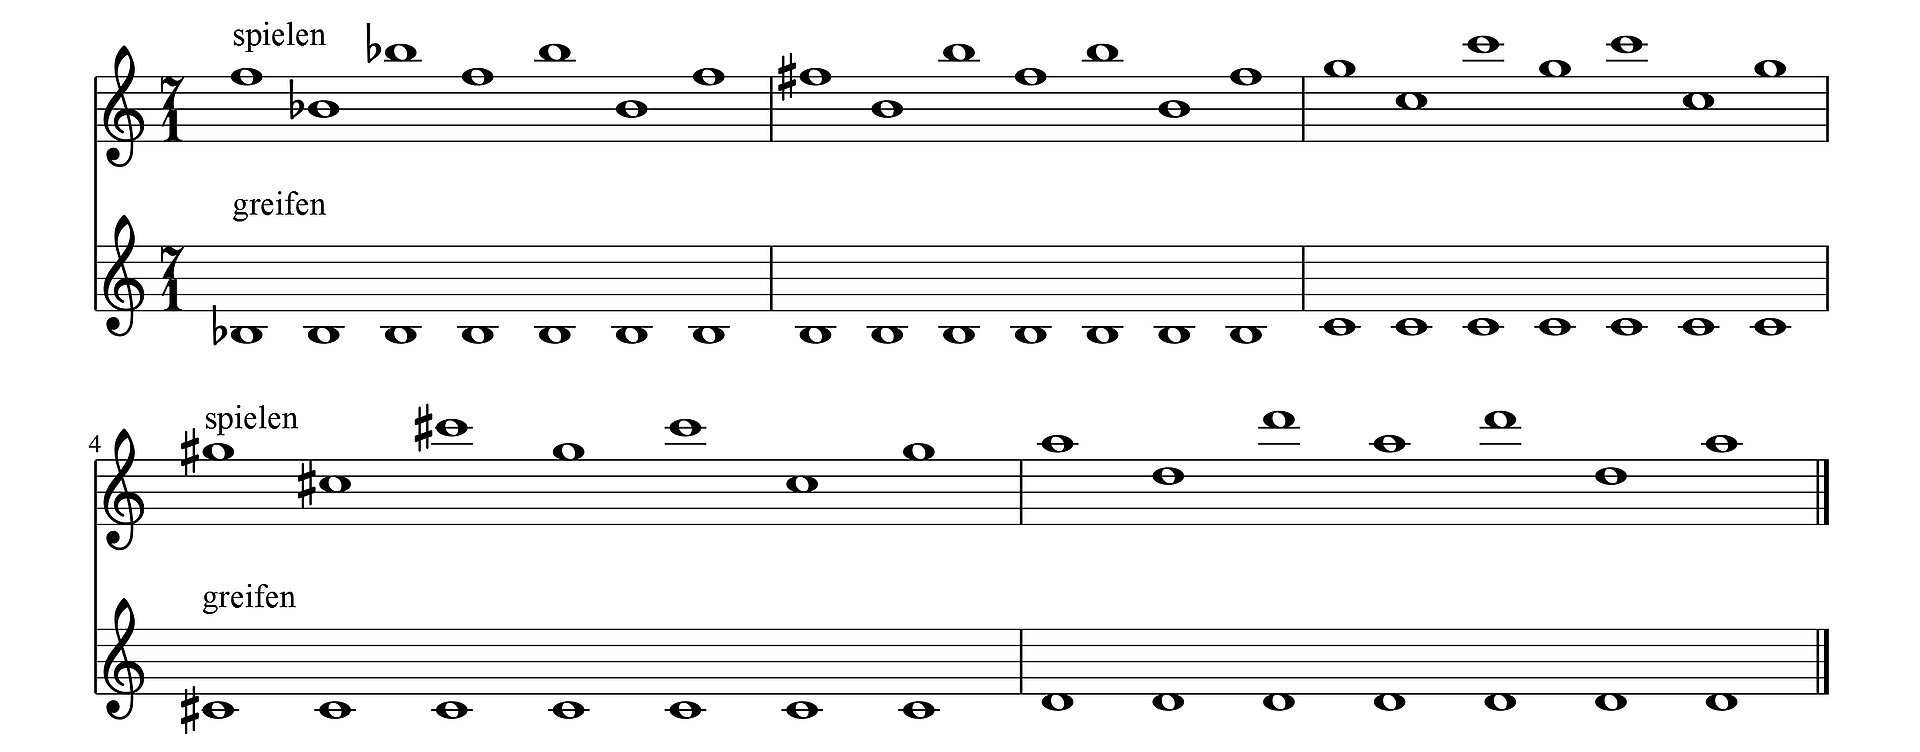
When the saxophone creates a sound, the ideal outcome is that the played tone is audible in the respective layer (octave). You can for example identify the tone with the help of a tuner: e.g. a sounding a"˜ = 440 Hz. At the same time, other overtones (partial tones) sound with the played basic tone (fundamental sound). This spectrum of overtones is – among others – responsible that the saxophone sounds like a saxophone instead of like a sine wave generator. The first overtone of a saxophone is easy to find - when for example played tones of the lower octave sound higher because of a too strong Embouchure or too much air pressure and without using the octave key. Now there's not only the octave of the played tone that can be created through an appropriate Embouchure and breathing. With a slightly stronger centered Embouchure, a stronger acceleration and a better focus on the air flow towards the reed, further higher sounds can be produced with the same played note. Exactly how the first overtone, which represents the second partial tone, lays an entire octave above the basic tone, the second overtone lays a fifth above the first overtone, which is the octave of the basic tone. The next overtone complies with the second octave of the basic tone, followed by a small third. The exact sequence of the intervals of the natural overtone can be seen in the following examples. Independent of the basic tone, the sequence of the intervals always stays the same. The examples should furthermore give an orientation for the upcoming exercises of this workshop.
Exercises with the natural overtones are a requirement for the controlled play of High Notes. Moreover, these exercises are ideal to practice Embouchure and hearing.
For this purpose the following hints:
1. The overtones of a basic tone are always played with the same played basic tone. Which means that the overtones always have to be created exclusively with Embouchure and air flow.
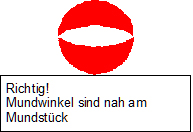
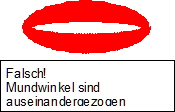
2. Embouchure should be firm and centered but not squeeze the mouthpiece with the reed. Where no air is able to flow, no sound can be produced. The following schematic representations should demonstrate the different lip positions:
3. The air flow at the reed isn't only influenced by Embouchure but also through the form of the oral cavity and the position of the tongue.
This is the most important aspect when it comes to creating overtones. While the first overtone, the octave, and maybe also the second overtone, which is the fifth in the octave position, can be produced through simple Embouchure increase, this won't work for the higher overtone positions. A further strengthening of the Embouchure won't let enough air flow past the reed. Accordingly, the other overtones need support through changings in the oral cavity. It has to be suitable to increase flow velocity and the amount of air on the reed, so that the overtones of higher frequency can be reached. The position of the oral cavity can easily be influenced by the imaginary creation of vowels: If there's for example an “F“ that should be played in the lower octave, you simply imagine to sing a sound which is located between “A“ and an open “O“ (like in “koala“). For the “F“ in the octave range, you imagine an “E“ or an “I“. For the highest gripped “F“, imagine to sing a sound like the “CH“ in German – best is to listen to the pronunciation of words like “ach“ and “echt“ in a translation program. The higher the notes get, the more the “CH“ sound gets pushed towards the sound „Ich“, while the “I“ gets sharper and sharper and the tongue is pushed against the hard palate in front part of the mouth. At the same time, the throat, the pharynx and the soft palate have to stay open and relaxed so that the air isn't stopped before the „jet“ that's produced by tongue and hard palate. The blowing out of air also requires a respective support of the torso musculature to keep a sufficient and controlled airflow.
Hint: When the third note of the overtone sequence is still kind of difficult to realize, it can help to first play it with the correct fingering, to listen carefully and to then sing the respective note in the correct position. In male voices, the tone can certainly lay in the head voice but should still be easy to sing. The correct intonation is crucial, that's why you should compare it again with the correctly played tone.
Then play the overtone again with the feeling of the sung tone.