As far as microphone placement is concerned, one should bear in mind that the main difference between woodwind and brass instruments lies in the fact that a woodwind instrument’s pitch is first and foremost determined by opening and closing its tone holes. Those movements indeed modify the length of the vibrating air column, causing the pitch to change. This also means that a woodwind’s tone is only partially produced by the bell: the tone holes and body also have an important impact.
As for brass instruments, the typical sound of a woodwind instrument is determined by its overtone structure. And again, the formants mentioned in my previous workshop are responsible for an instrument’s recognizable sound.
The main differences between woodwind and brass instruments can be ascribed to their overtone structure. This means that a microphone for capturing a woodwind instrument should be located in an altogether different position from a brass instrument.
A clarinet’s sound is rather complex and depends essentially on the register. To be more specific: there are three registers with different overtone structures. The lowest register features a lot of harmonics, while the highest is shaped by the fundamental and a formant in the 3kHz~4kHz range.
One thing to bear in mind is the clarinet’s wide dynamic range and the resulting overtone structure. Playing pianissimo in the single ledger-line octave produces a spectrum up to 1.5kHz, while fortissimo notes in this range go up to 12kHz.
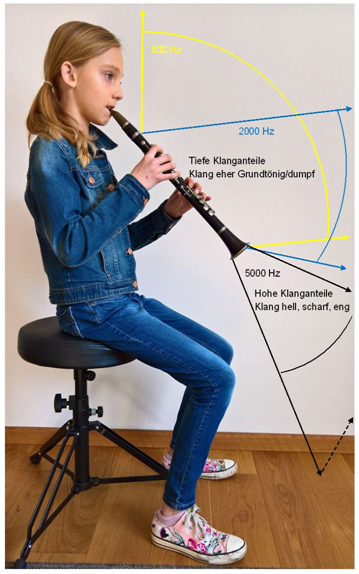
Like other woodwinds, the clarinet projects frequencies up to 1kHz mainly via the open tone holes. As the frequency rises, the projection shifts increasingly towards the bell. The following illustration shows the clarinet’s frequency-dependent projection behavior:
Schematic projection behavior of a clarinet: the bell’s high-frequency output towards the floor, close to the music stand, etc., are something to bear in mind as well. (Attentive readers will probably have noticed my virtual assistant Franziska. she doesn’t play the clarinet, by the way… ;-)
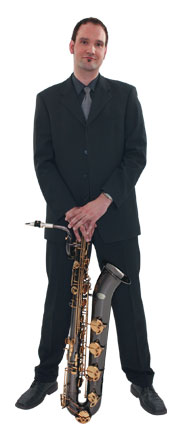
Unlike the clarinet, a saxophone has a conical body. A typical saxophone sound is characterized by the powerful first-order overtones. The body shape is responsible for the overtone structure, which is quite unlike the clarinet’s—even though both instruments use a single reed.
The upward bell causes the low and high sound components to mingle, which is especially prominent when close-miking.
A flute’s fundamental covers a wider frequency range than the one of other woodwinds. Formants are hardly noticeable, and the highest sound components are located at 3kHz~6kHz.
Woodwinds produce a lower sound-pressure level than brass instruments. This is why more sensitive condenser microphones can be used without hesitation. Care should be taken, however, to choose a microphone whose frequency response neither emphasizes nor attenuates the instrument’s frequency range and formants.
The microphone’s directivity essentially depends on the intended effect:
If you wish to isolate the signal in question, choose a hypercardioid microphone pattern. This may be counterproductive, however, because a woodwind instrument is not a spot signal source: the entire instrument acts as a tone generator. If you nevertheless prefer a hypercardioid microphone, remember to place it at 50~60cm from the instrument. A cardioid microphone with a wider pattern, on the other hand, may benefit from being closer to the instrument. This would have the additional benefit of the cardioid microphone’s superior background attenuation compared to that of a hypercardioid.
![[Translate to Français:] Example 1: Dynamic cardioid microphone (Audio-Technica AE 2300) on a short stand](/fileadmin/user_upload/profitipps/allgemeine_tipps/juergen_wieching_tontechnik_5/Dynamisches-Mikrofon-mit-Nierencharakteristik2.png)
![[Translate to Français:] Example 2: Cardioid condenser microphone (Audio-Technica Pro 35) attached to the music stand](/fileadmin/user_upload/profitipps/allgemeine_tipps/juergen_wieching_tontechnik_5/Kondensator-Mikrofon-mit-Nierencharakteristik-3.png)
For woodwind instruments, microphone placement for close-miking scenarios poses a real challenge. The illustration shows that a clarinet or a soprano saxophone has several areas with rather different frequency response patterns. Ideally, two microphones should be used. Ask your trusted dealer for suitable combinations. When using a single microphone, a workable compromise can be achieved by pointing the microphone not too closely towards the lower body region, just above the bell. Focusing on the bell would result in a sharp, narrow sound that doesn’t reflect the instrument’s natural tone because of the excessive amount of high frequencies.
If that is what you are looking for, consider using a short microphone stand (see example 1), or clipping a microphone to the bell. As an alternative, you could use a special instrument mount. A clip-on microphone could also be attached to the music stand and to the instrument itself for solos (see example 2).
![[Translate to Français:] Example 3: The microphone is directed over the bell, towards the center of the saxophone body](/fileadmin/user_upload/profitipps/allgemeine_tipps/juergen_wieching_tontechnik_5/Molly-Duncan-4.png)
Tenor and alto saxophones are not prone to frequency separations in a close-miking scenario, because all frequencies are combined inside the upward-pointing bell. I would nevertheless advise against pointing the microphone directly at the bell. After all, even in the case of a saxophone, the bell tends to emphasize the high-frequency range, which leads to a harsh sound. Doing so only makes sense when the instrument has a mellow sound and would benefit from some added presence. Another consideration is that the high notes in the two octaves above the G are mainly projected by the upper body section, while the low notes essentially emanate from the bell. Pointing the microphone at the bell might cause the low notes to sound somewhat boomy and uncontrolled, while the higher notes are much softer.
The following illustration shows a tried-and-tested microphone placement technique (Example 3) used for the Average White Band’s Molly Duncan on tenor sax.
A balanced and smooth tone can be achieved above the tone holes. If you also want to pick up the breathing noises, place the microphone closer to the headjoint. For a balanced sound, install the microphone on a stand raised 0,5m~1m above the instrument. For minimum background spill, consider using a hypercardioid microphone. With its superior resolution, a condenser mike is likely to produce the best result. A headset microphone might also work. It has the advantage that the musician can freely move their head. Expert placement of the microphone will allow you to mix the breathing noise into the overall sound. The main advantage of a headset microphone—as opposed to a clip-on model mounted on the flute—is that the player is free to switch instruments (from flute to piccolo, and back) without hassle.